I’m trying to keep my NAT to WAN rule working for the default gateway and set up a second gateway from a bridge IP for my VPN.
I do not know how to make the NAT rules distinguish what IP (gateway) the traffic is coming from and masquerade accordingly.
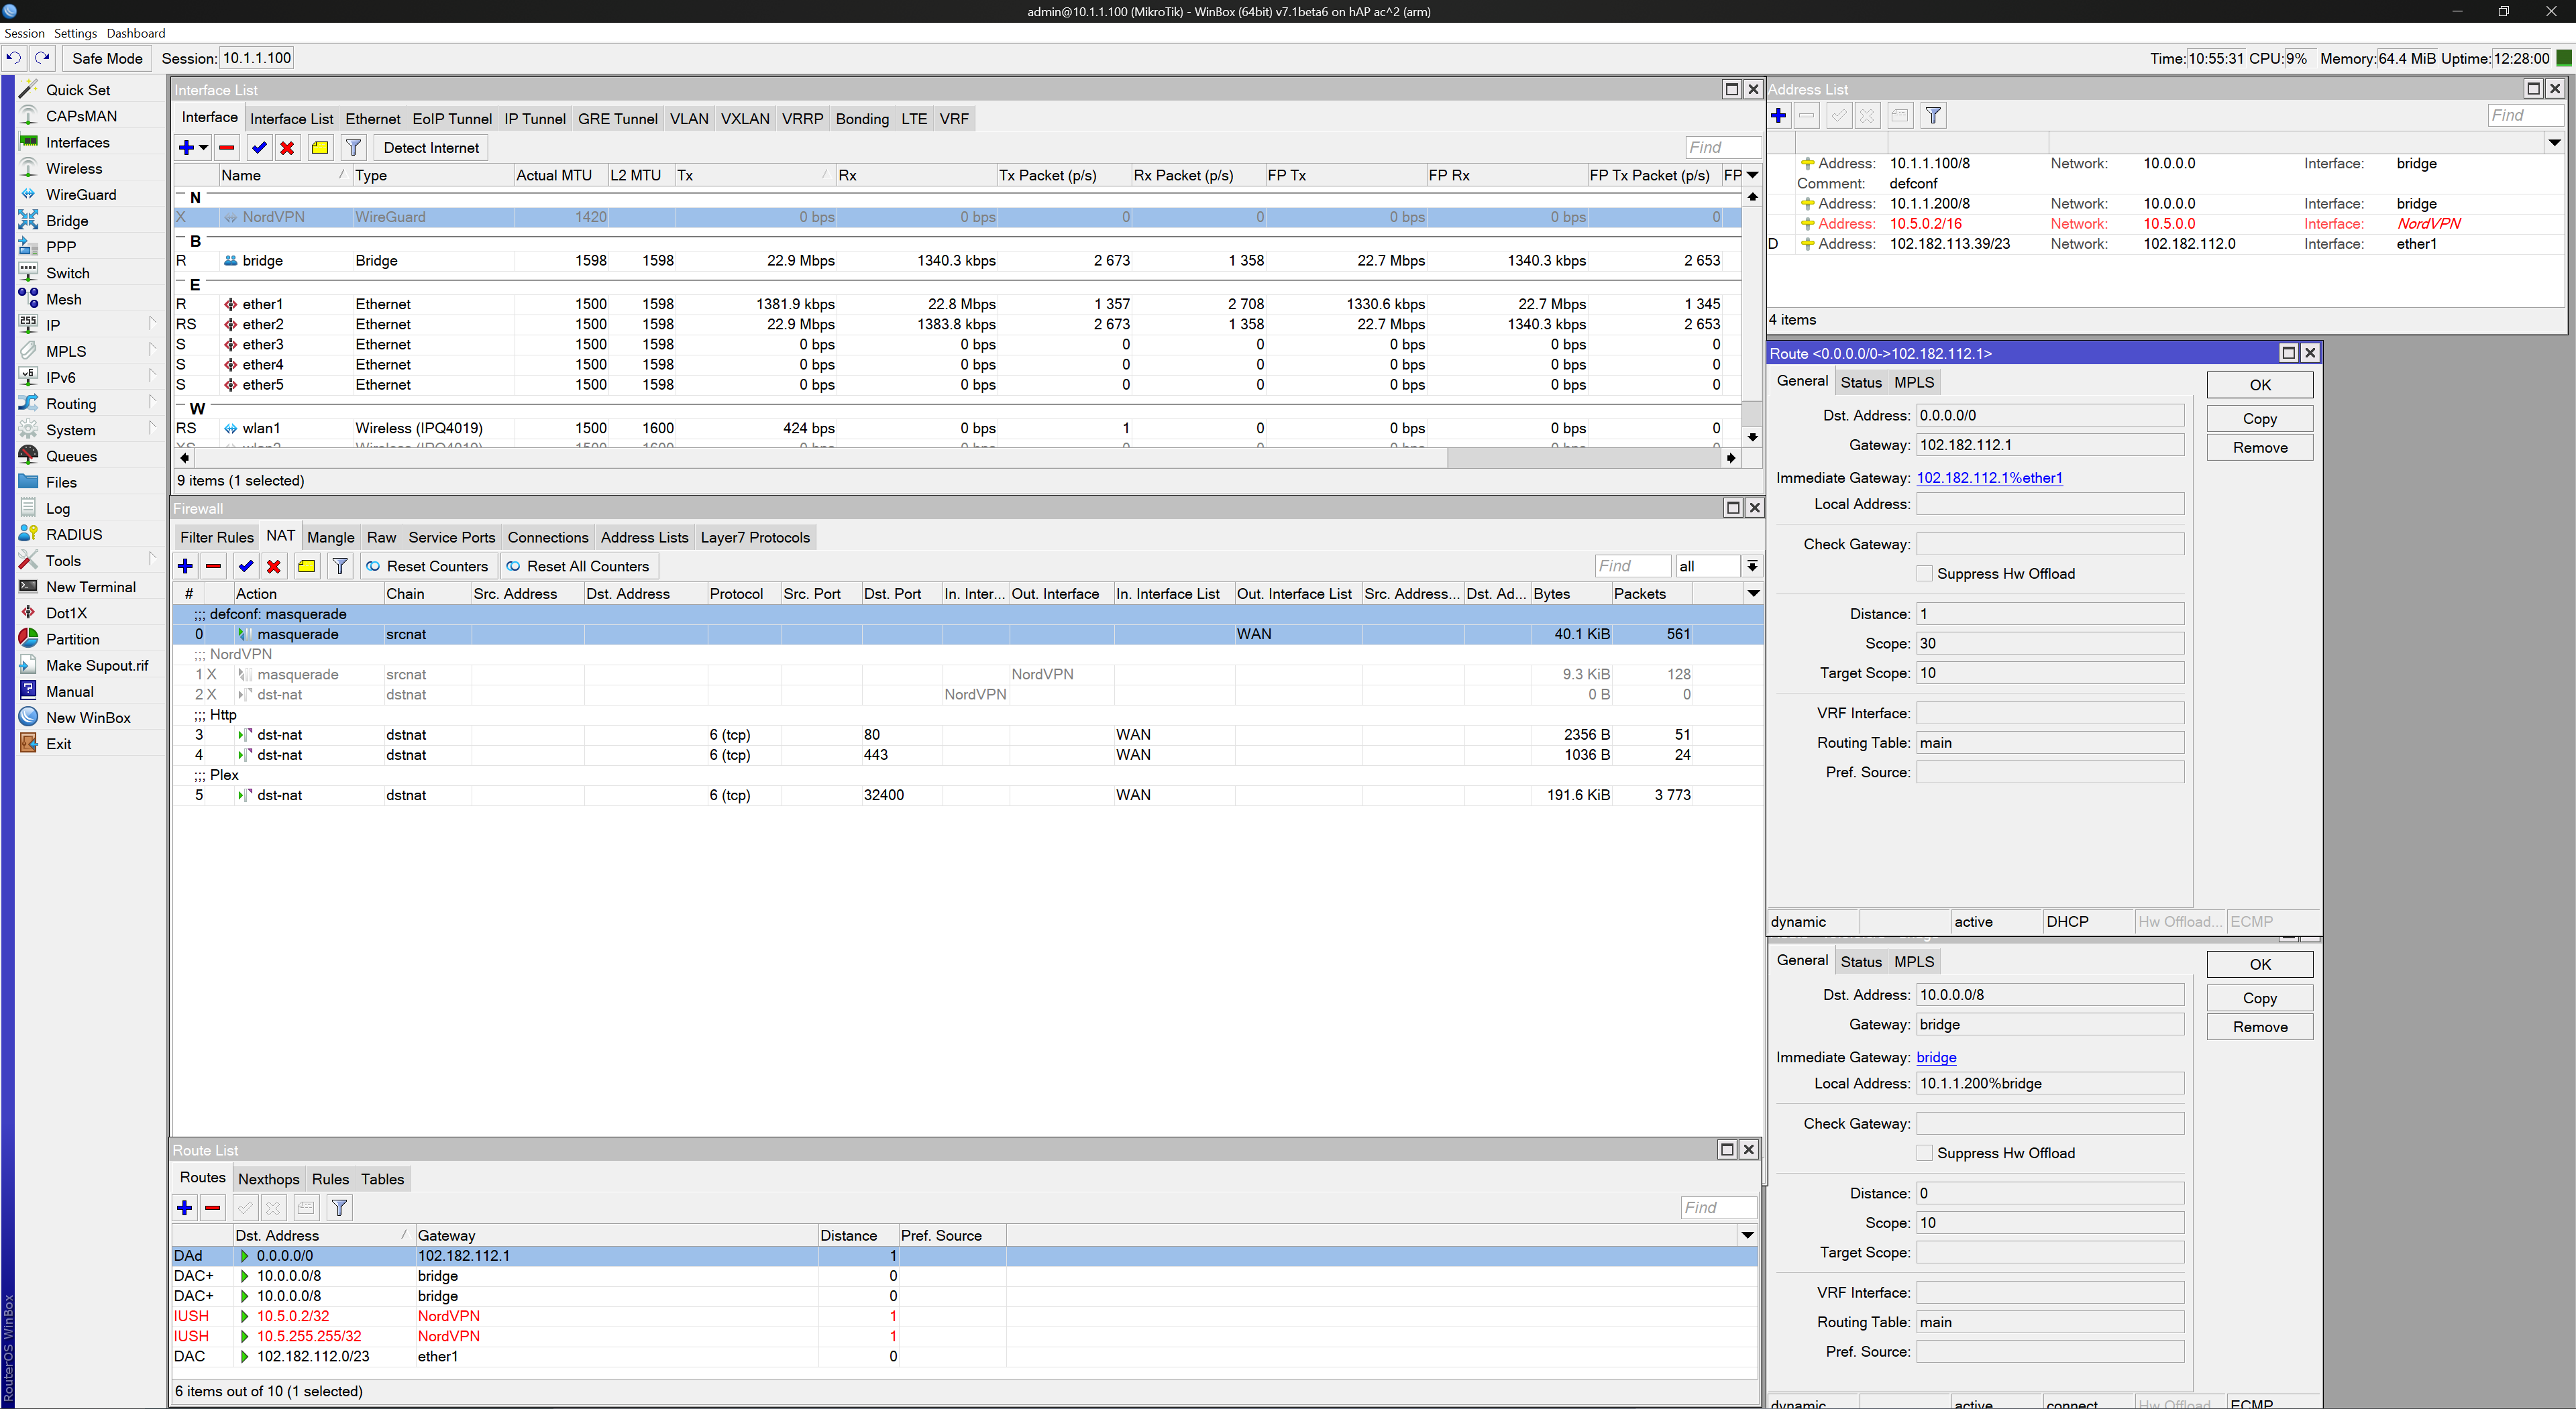
I’d like to use 10.1.1.200%bridge as the VPN gatewayn and keep 10.1.1.100%bridge as the default gateway, but these routes are auto created and I cannot edit them, see attached.
I suspect I need to make the Wireguard NordVPN tunnel (working great) part of the WAN, as the default auto route for 0.0.0.0/0 routes to the WAN? I cannot figure out how to make the NAT rule distinguish which gateway the traffic is coming from and send to correct interface?
Screenshot attached (VPN disabled until I can get this to work )
Please let me know if you require more information. Can anyone assist please?
Thanks
Regarding routes, I believe you need to use different routing tables. In Mikrotik the functionality can be achieved by using “routing mark” or something like that.
Also there is no need for Wireguard to NordVPN servers, you can use IPSEC/IKE2 instead as most of Mikrotik routers do support hardware acceleration.
Tagging traffic seems over complicated for a simple gateway to a VPN. Split networking working with Wireguard for Windows, so guess that will have to do.
OpenVPN UDP (not supported by Mikrotik) is twice as fast as IKE. Wireguard (UDP) is in beta 7. It’s even faster than OpenVPN UDP and connects/reconnects instantly.
Set a route in the main table to the NordVPN server/32 to use the IP%ethernet1. (just add routes to a list you want to to give access via WAN)
Add a route for 0.0.0.0/0 to use gateway NordVPN (wireguard interface), add this to a new table i.e. main2
New feature in ROS7 routing rules:
Add a routing rule for 0.0.0.0/0 to lookup interface bridge to use table main2. (to mitigate the default added rule to the WAN)
In the event that the tunnel goes down, there’s no more default out rule.
I added a firewall rule for In interface Lan with “an allow destination IP list” as an extra leak safeguard.
Have fun with NordVPN Wireguard! The PC version of Wireguard kills 127.0.0.1 (dns etc) and some powershell commands notably Invoke-RestMethod.
I tryied to find something but there is a lot of suggests and some confusion but not a real thread.
It should be really interesting to have a real guide to set mikrotik wireguard for NordVPN
I am able to extract the Nordlynx’s private and public key on linux system. But i am not familiar on routing configuraiton. Hope someone can teach me to setup a routing on routeros to route the traffic from apple tv to wireguard vpn.
Hi Daniel,
This is one way to approach a wireguard setup and it fits most circumstances.
A home connection from MT router to third party vendor should be snap easy. https://forum.mikrotik.com/viewtopic.php?t=182340 The idea is to keep it simple and clean.
The vendor is the server, and your MT acts as a client, to establish the tunnel.
Thus you need to tell the vendor some things… like the MT public key, the IP address or IP subnet of your devices to put on the Nordlynx allow addresses peer setting.
What you need from the vendor is the listening port of their server and the public IP address or URL dyndns name they provide to go with that.
You need their public key to put in your MT peer settings.
The allowed address you put on your MT peer settings is 0.0.0.0/0
Suggest you put persistent keep alive to something like 30 seconds.
You are pretty much done… except for one thing.
You need to tell the apple device to go out the wireguard tunnel right.
Lets say apple device is on a subnet and its IP address is 192.168.5.0.10 That is the IP address you needed to give nordlynx for their allowed address peer settings as noted above.
All you need is three steps.
Create a table via terminal CLI command:
/routing table add name=useWG fib
Create IP route
dst-address=0.0.0.0/0 gwy=wg-interface-name table=useWG
Note: if you wanted the apple tv to be able to access the normal MT router internet if the wireguard connection is broken then use → Action: “lookup” instead.
Done and no need for any other settings on the MT (no need to set IP address for example).