Thanks to @pssara1 for the original guide. To capture some updates, extra details and not detract from the discussion that was had in there, I've written a new guide. From the firewall creation onwards it's largely the same. It was written with ROS 7.24 there is currently a bug impacting wireguard.
The same goal applies, we want to connect a Mikrotik Router itself to NordVPN via wireguard. We then want to route certain internal IP addresses via the VPN while leaving the rest alone. I want to be able to easily swap end points. There is nothing stopping you just having one end point
The same prerequisites are needed, the linux machine I've used is Ubuntu Server but should be broadly comparable with others. I've not tried to do this on a GUI version of Linux.
- A Mikrotik router running RouterOS v7.x
- A Linux system (e.g. Ubuntu, Debian, RHEL etc) to retrieve necessary keys
- An active NordVPN subscription
Step 1: Install NordVPN on Linux
sh <(curl -sSf https://downloads.nordcdn.com/apps/linux/install.sh)
The NordVPN guide if you encounter any problems. Link
Note that above guide is currently wrong for the login process for CLI users.
Step 2: Install wireguard on Linux
sudo apt install wireguard
Step 3: NordVPN Login
You need to login to your NordVPN account via web browser somewhere to create a token.
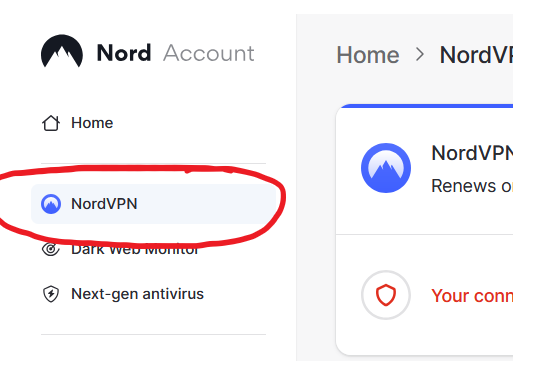
Once you have logged in, look for the NordVPN icon as shown below and click that.
Then look in the middle of the page, down the bottom, you should see Get Access Tokens.
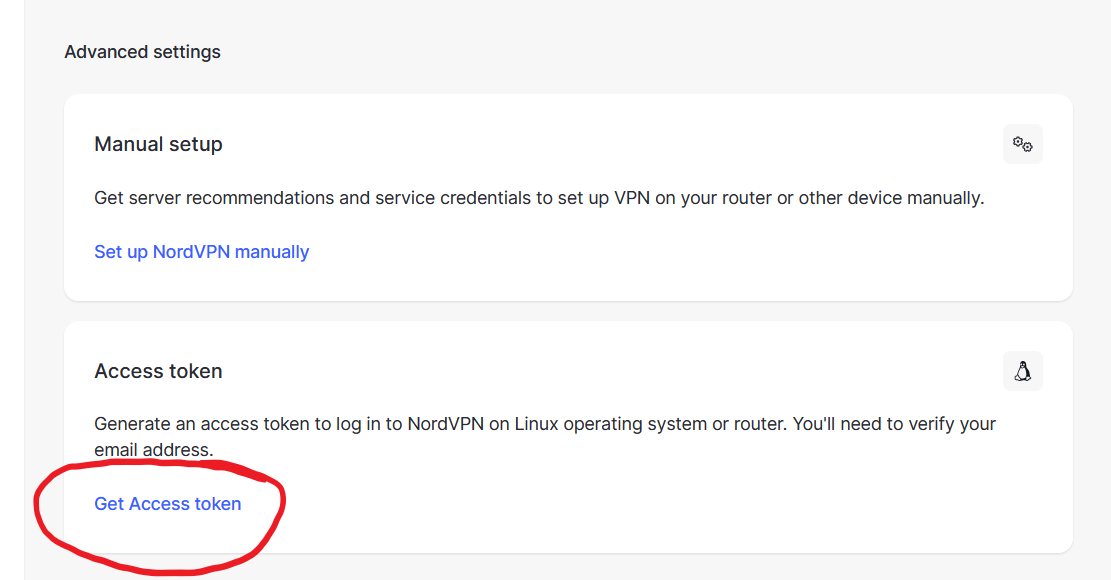
This link for token generating worked when I wrote the guide.
https://my.nordaccount.com/dashboard/nordvpn/access-tokens/authorize/
You will need to jump through some MFA steps to generate the token. During the token generation process you will only get ONE opportunity to copy the token, so paste it somewhere like notepad++ etc. .
With your token, go back to your linux machine and issue the following command.
nordvpn login --token token_hash_here
Example: nordvpn login --token e9f2abedfsjhgurjuyru654ethrliuyo98768i6yrfnc8677d2fa
Step 4: NordVPN Connection Details
Assuming your using a remote linux machine and you just type 'nordvpn connect' you will experience the rude shock of being disconnected, as NordVPN by default will block LAN access. Issue the following command to prevent it.
nordvpn set lan-discovery enabled
Now connect by issuing.
nordvpn connect
Now extract your private key. This key is unique to your account, but common across the different servers you might use.
sudo wg show nordlynx private-key
Example: aBcDeFgHiJkLmNoPqRsTuVwXyZ1234567890abcdef=
Now we need to figure out which server/s you might want to use.
The easy way
Go to your linux machine and enter the following command. It will query the nordVPN API and get an answer for you. Obviously it doesn't give you any choice over the exit point so it's probably not the answer you need.
curl --silent "https://api.nordvpn.com/v1/servers/recommendations" | jq --raw-output '. | .hostname + "\t" + .station + "\t" + (.technologies | select(.identifier == "wireguard_udp").metadata[0].value)'
A more tedious way
Go back to the NordVPN webpage. See the screen shot above where we created the manual token, above that there was manual setups, we need to go there. Manual setup link
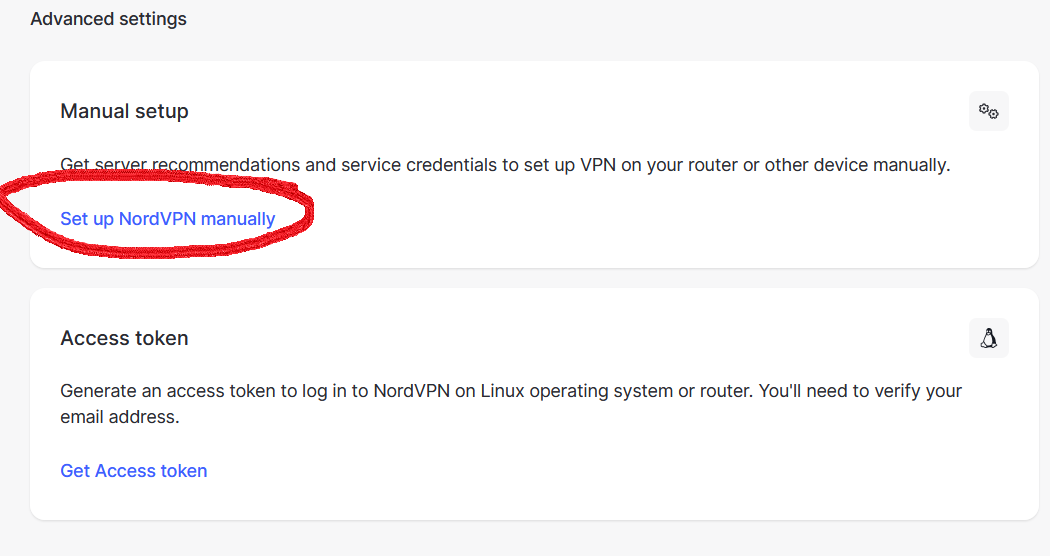
For all the different servers you want the Mikrotik to connect too, you need to note down the URL's for them. For example a Swedish server currently recommended is se668.nordvpn.com, the bit we need is "se668". So I'll grab a few of these, fr1259, tr88, sg701, jp744, us13080.
Now for each of these server names go back to the linux machine and issue
sudo wg show nordlynx && ip addr
You're going to get details like this.
public key: aBcDeFgHiJkLmNoPqRsTuVwXyZ1234567890abcdef=
 private key: (hidden)
 listening port: 60262
 fwmark: 0xe1f1

 peer: aBcDeFgHiJkLmNoPqRsTuVwXyZ1234567890abcdef=
 endpoint: 10.11.12.13:51820
 allowed ips: 0.0.0.0/0
 latest handshake: 1 minute, 9 seconds ago
 transfer: 9.50 KiB received, 21.06 KiB sent
 persistent keepalive: every 25 seconds

 14: nordlynx: <POINTOPOINT,UP,LOWER_UP> mtu 1420 qdisc noqueue state UNKNOWN group default qlen 1000
 link/none
 inet 10.5.0.2/16 scope global nordlynx
You will need to record the "peer". Check the endpoint port is 51280, they all seem to be that.
Mikrotik can handle a URL so we don't need the endpoint IPv4 address but you can use it if you want. The "public key" is what your private key gets hashed into, we don't want that. Check the IP address, the only address I ever saw was 10.5.0.2 and I wouldn't be surprised if it's always configure as that.
For even more choices you can dive in here
You must hate yourself
There is the ability to get more information than you can probably handle, that's by using the NordVPN API.
There is stacks of information in there, cities, server load, the types of VPN services etc.
Use it at your own risk and don't be surprised if it doesn't want to work for you.
- Using firefox browser open this URL. https://api.nordvpn.com/v1/servers?&limit=10000
- Go to the raw data tab and copy that data to notepad++
- Do a replace (ctl+h)
Find what: }}]},
Replace with: }}]},\n
Let that run. - Now you should have a CSV looking pile of text about 7-9k lines long.
- Copy that to excel
- Do a text to column conversion looking for commas as the separating symbol.
Now you will see that data is not 100% sanitised. The same data is stored in different fields when you look at different countries but if you went to this much trouble, I'm sure you can handle that. I didn't find there was data missing that I needed, so I think you'll be ok.
You will need to get the details of these connections you want to use as described above. You can find it in the spreadsheet and coupled with all the endpoint ports seem to be 51280 you should have enough details. If you encounter any issues it's probably best to connect with linux and confirm the details as described above.
A useful post on manipulating the API
Otherwise a bit of Google foo should you lead you sufficiently into the rabbit warren.
Step 5: Mikrotik interface setup
Create the Wireguard interface
Replace "your private key" with the one you collected earlier.
/interface wireguard add listen-port=51820 mtu=1420 name=WG-NordVPN private-key="your_private_key"
Add the Peer/s
Replace SERVER with your server id, so you end up with something like sg677.nordvpn.com. IPv4 address' also work here.
Replace PEER with the peer keys you collected from each server earlier.
If you try add two peers with the same public-key the Mikrotik won't allow that.
/interface wireguard peers add allowed-address=0.0.0.0/0 endpoint-address="SERVER".nordvpn.com endpoint-port=51820 interface=WG-NordVPN name= public-key="PEER"
Configure an IP address for the Wireguard interface you created.
/ip address add address=10.5.0.2 interface=wg-nordvpn network=10.5.0.0
(I've fairly well copied the original guide from here down. Changed names/numbers where appropriate)
Step 6: Configure Firewall Rules
Allow Incoming WireGuard Connections
/ip firewall filter add action=accept chain=input comment="Allow WireGuard" dst-port=51820 protocol=udp
Allow Specific IPs to Use the VPN
First, define the list of IP addresses that are allowed to use the VPN:
/ip firewall address-list add address=192.168.1.0/24 list=access_vpn
Create a Firewall Rule to Allow Forwarding:
/ip firewall filter add action=accept chain=forward comment="Allow VPN Traffic" out-interface=WG-NordVPN src-address-list=access_vpn
Configure NAT for Outgoing Traffic
/ip firewall nat add action=masquerade chain=srcnat out-interface=WG-NordVPN
Step 7: Configure Routing and Implement a Kill Switch
Create a New Routing Table
/routing table add fib name="private_route"
Add Routing Rules
Route traffic from specific hosts through the VPN:
/routing rule add action=lookup-only-in-table src-address=192.168.1.100/32 table=private_route
Or route traffic to specific destinations (e.g., NordVPN DNS server):
/routing rule add action=lookup-only-in-table dst-address=103.86.96.100/32 table=private_route
/routing rule add action=lookup-only-in-table dst-address=103.86.99.100/32 table=private_route
Note: 103.86.96.100* and *103.86.99.100 are DNS servers provided by NordVPN.
Configure Routes for the New Table
Add a blackhole route as a kill switch:
(This shouldn't be needed, if the router can't route via this particular routing table it should just drop the traffic, something for you to test?)
/ip route add blackhole distance=5 routing-table=private_route
Add a route through the WireGuard interface:
/ip route add distance=2 gateway=WG-NordVPN routing-table=private_route
Step 7: Test the Configuration
- Ensure that devices specified in the address list are routing traffic through the VPN.
- Verify that the kill switch works by disabling the WireGuard interface and checking if traffic from the specified devices is blocked.
- Check your end device configuration, especially around the DNS servers it's using. If you don't like using Nord's DNS servers I found Google 8.8.8.8 and 8.8.4.4 to work satisfactorily.
Step 8: Changing the end point for the VPN
As mentioned earlier, there is a bug impacting Wireguard peers in 7.24
If you put multiple peers in the configuration, you can change where your end point is by disabling the current peer and enabling a new one. Again, be contentious of old DNS entries and having only one enabled peer at a time.