This comes up from a discussion in the 7.22beta thread, mainly with @wfbuton on creating "self-signed wildcard certificates". But it test of using reverse-proxy to run VSCode for Web (code-server) in /app container, using my [TikBook notebook extension], to then test creating wildcard certs.
And also add a function to create an Apple Profile (.mobileconfig) that can be used to install root certificate into iOS (or any Apple platform) that could be used elsewhere. Since "how to use with apple" came up in the 7.22 discussion with @wfbuton.
The following "TikBook" is still a valid .rsc file and usable in /system/script/etc...
reverse-proxy.md.rsc (11.1 KB)
But will open with in VSCode (with TikBook extension installed), the various block shown below are cells that can be run individually:
Install TikBook extension into VSCode, see forum post that describes more:
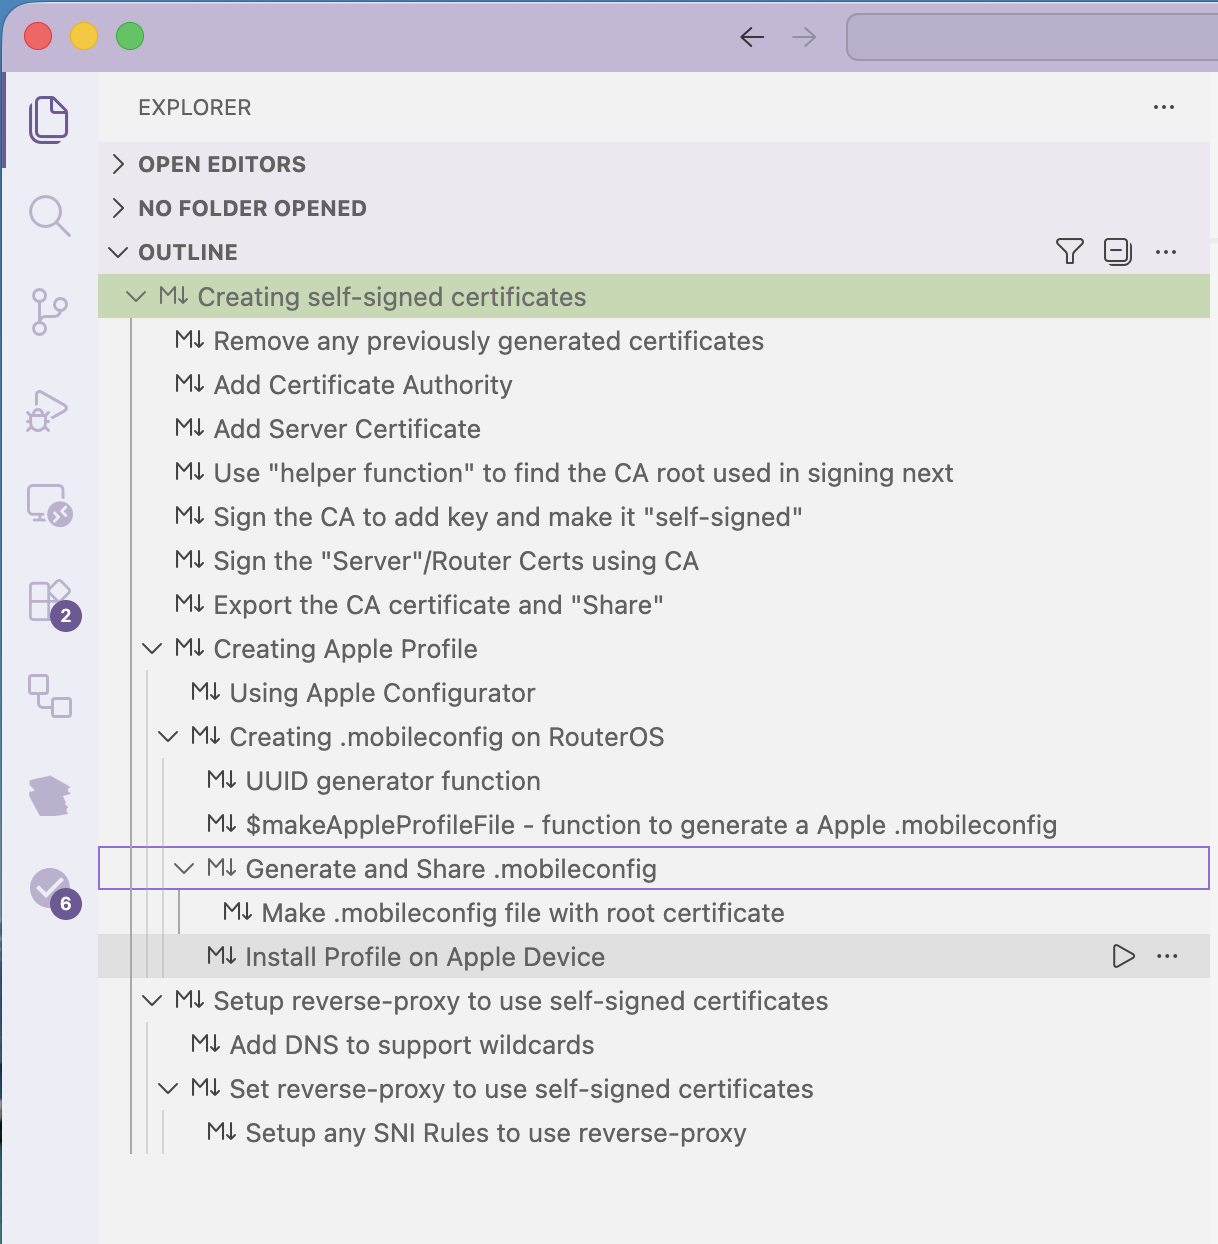
And withVSCode, things like the "Outline" view also work, so can "jump" to various parts of a script (or run parts too):
And if "Open With Markdown" in VSCode, you get the following markdown, which allow quick posting from the TikBook to the forum... And in Markdown view, you can also use the VSCode help to "Run on RouterOS":
So the example below was edited in TikBook, then converted to a "RouterOS Markdown" notebook for the post below. And, why there are global variables, since side-effect is you need global to pass variables between cells (as each cell has its own local scope) — less ideal for forum example, but super easy to go from testing to posting
Anyway, since it what I used to test some new 7.22 stuff, including the code-server app which allow TikBook in web, via a RouterOS container... thought it be good real-world example of using VSCode with TikBook.
[//]: #!tikbook
Creating self-signed certificates
For use with new RouterOS 7.22+ reverse-proxy, and includes generating an Apple "Profile" to install root CA into iOS and other Apple platforms.
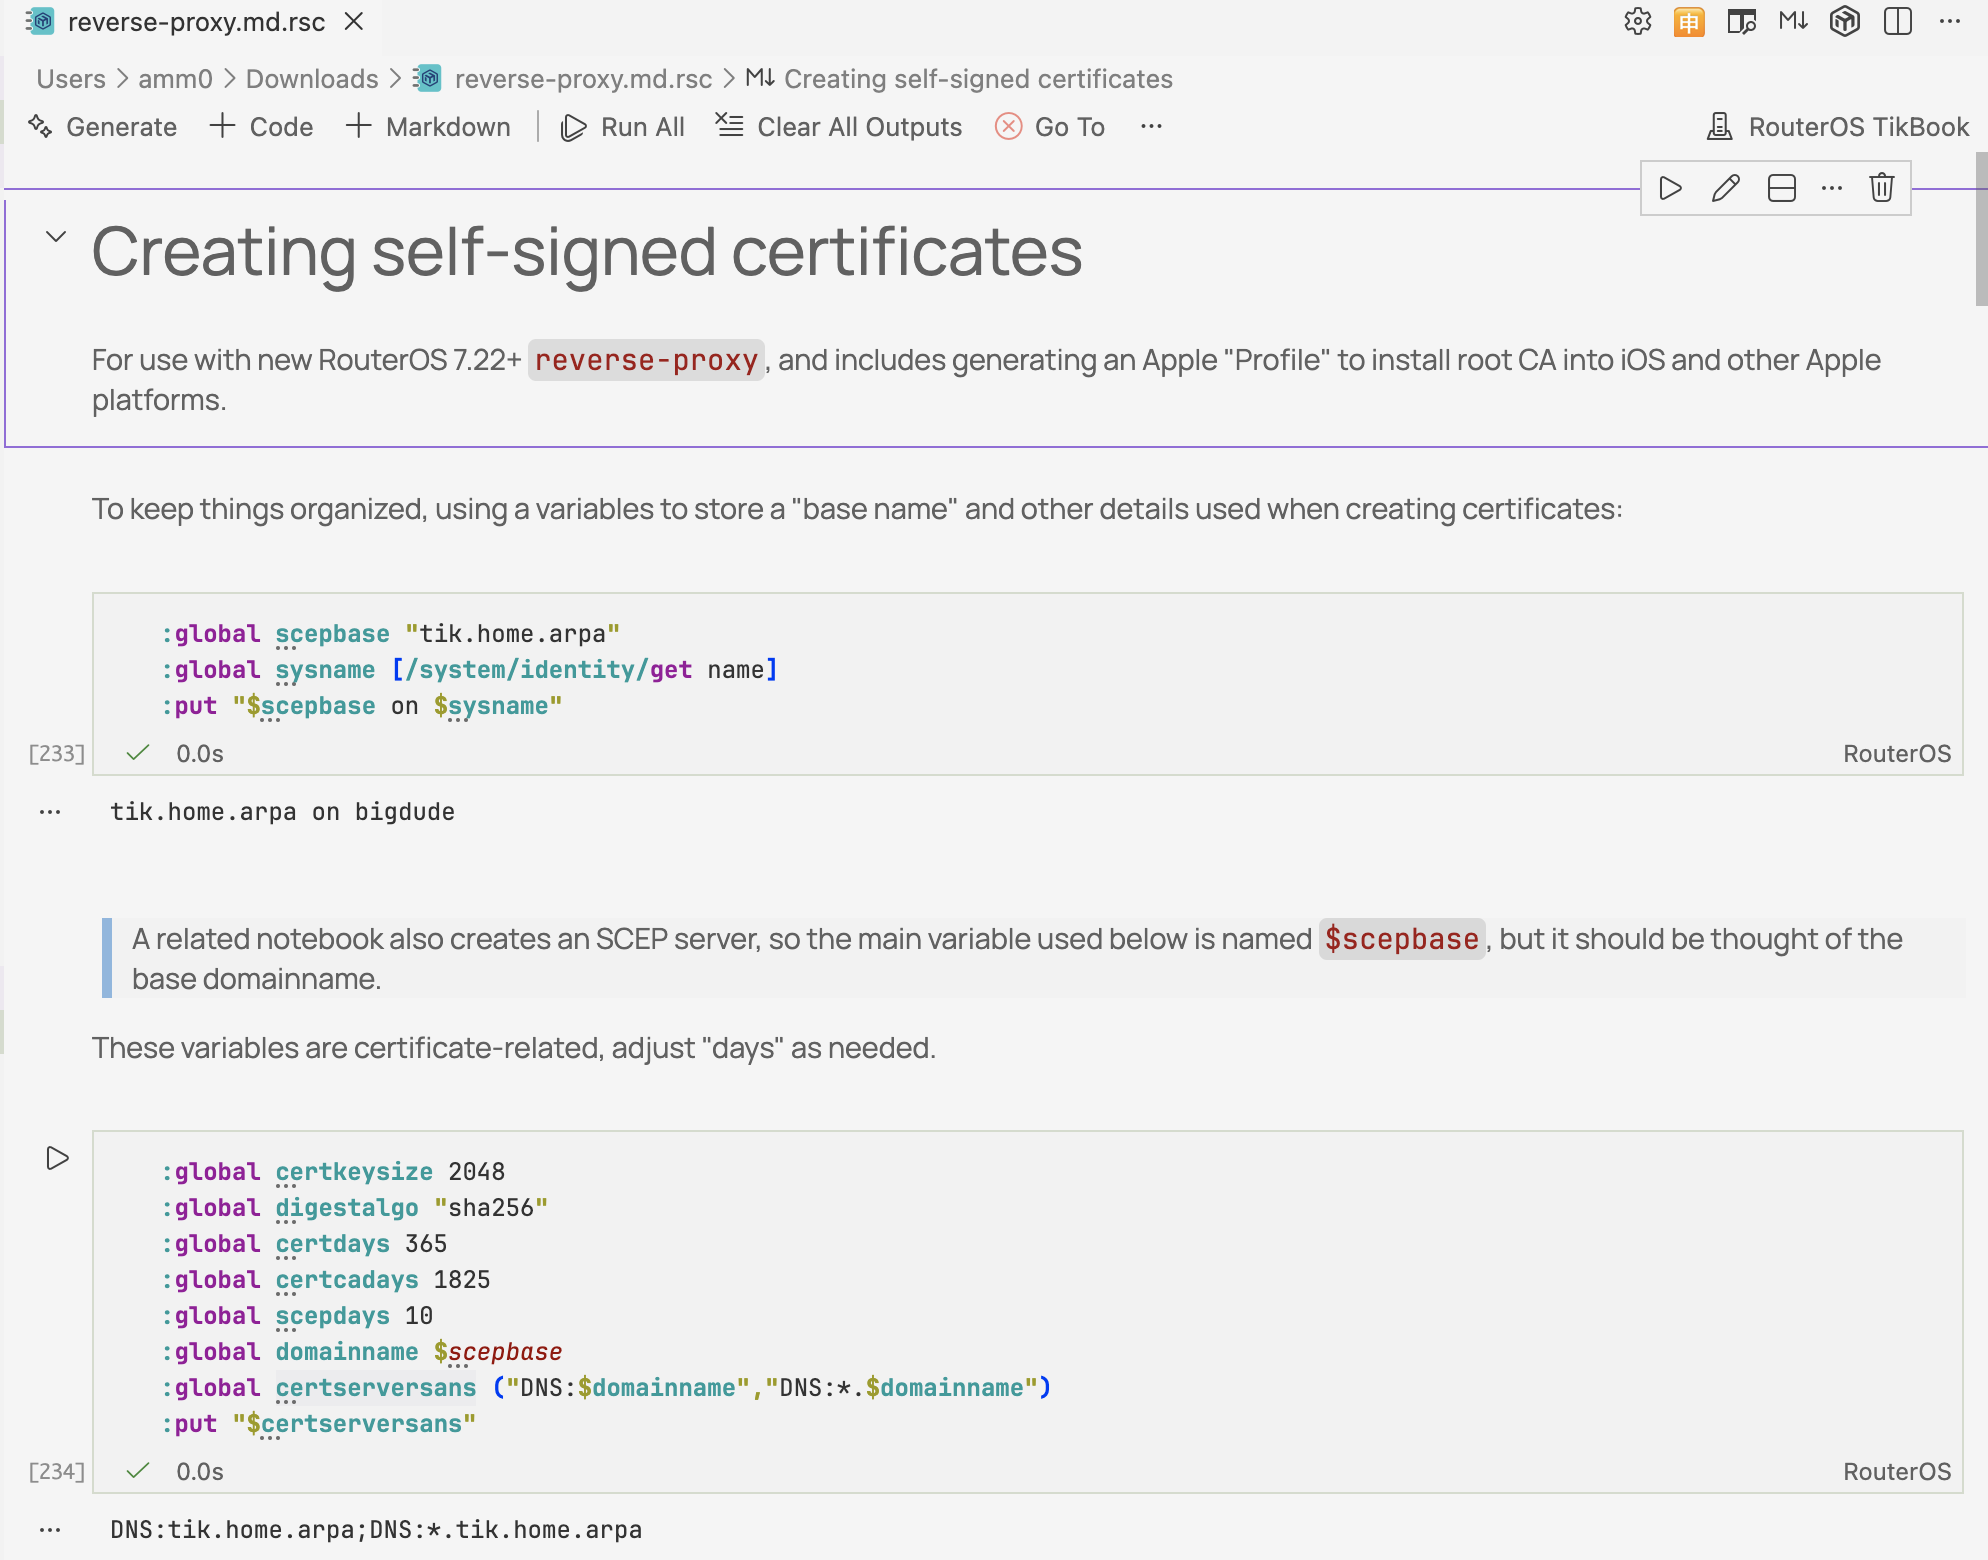
To keep things organized, using a variables to store a "base name" and other details used when creating certificates:
:global scepbase "tik.home.arpa"

:global sysname [/system/identity/get name]

:put "$scepbase on $sysname"
A related notebook also creates an SCEP server, so the main variable used below is named
$scepbase, but it should be thought of the base domainname.
These variables are certificate-related, adjust "days" as needed.
:global certkeysize 2048

:global digestalgo "sha256"

:global certdays 365

:global certcadays 1825

:global scepdays 10

:global domainname $scepbase

:global certserversans ("DNS:$domainname","DNS:*.$domainname")

:put "$certserversans"
Output what we know about certificates from RouterOS before doing anything.
If this is run in a TikBook, this
plain/textto see the results of the:execute"
/certificate/print
Remove any previously generated certificates
Since we're testing, just remove any existing certificates using our scheme. This allow the notebook to run multiple times. Now for
/certificate, that means client certs associated with any created here get deleted. So likely you want to run this "once".
/certificate { :foreach c in=[find name~"$scepbase"] do={ :do { remove $c } on-error={ } } }
Add Certificate Authority
/certificate add name="$scepbase-$sysname-ca" organization=$scepbase common-name="$[:convert transform=uc $scepbase] Authority ($sysname)" unit=$sysname digest-algorithm=$digestalgo days-valid=$certcadays key-usage=key-cert-sign,crl-sign key-size=$certkeysize
Add Server Certificate
/certificate add name="$scepbase-$sysname-router" organization=$scepbase common-name=$domainname subject-alt-name=$certserversans unit=$sysname digest-algorithm=$digestalgo days-valid=$certdays key-usage=digital-signature,content-commitment,key-encipherment,data-encipherment,key-agreement,tls-server,tls-client,code-sign,email-protect,timestamp,ocsp-sign key-size=$certkeysize
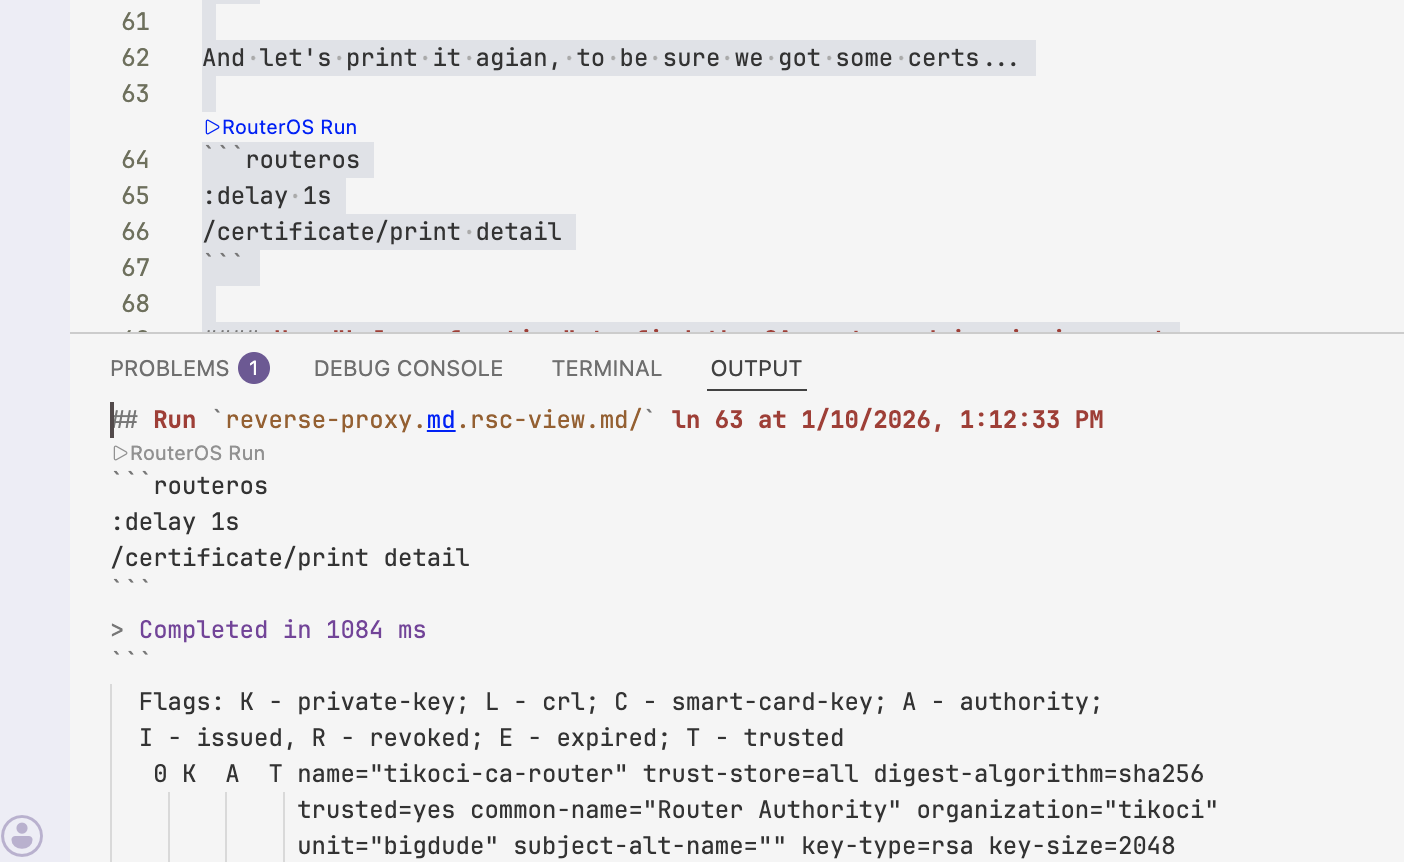
And let's print it agian, to be sure we got some certs...
:delay 1s

/certificate/print detail
Use "helper function" to find the CA root used in signing next
:global getScepAuthorityName do={

:global scepbase

:global sysname

:return [/certificate get [find name="$($scepbase)-$($sysname)-ca"] name]

}

:put [$getScepAuthorityName]
Sign the CA to add key and make it "self-signed"
/certificate/sign [$getScepAuthorityName]
Sign the "Server"/Router Certs using CA
:delay 5s

/certificate sign ca=[$getScepAuthorityName] [find name="$scepbase-$sysname-router"]
Export the CA certificate and "Share"
Export as PEM and share using BackToHomeFiles to allow manual profile creation
# before doing that save the file name...

:global caCertFileBase "/$[$getScepAuthorityName]"

:global caCertFile "$($caCertFileBase).crt"
/certificate/export-certificate [$getScepAuthorityName] file-name=$caCertFileBase
At this point, Files on router will have the root certificate that can be manually downloaded and installed.
/file print proplist=name where name~".crt"
Creating Apple Profile
Using Apple Configurator
With the CA certificate (URL to it shared above), you can use Apple Configurator.app (downloadable from Apple App Store) to create a .mobileconfig Profile file. This file is used by most Apple products to install "Profile". For use here, the Profile just contains the self-signed root authority, and information on to obtain a client certificate from SCEP.
While
.mobileconfigprofiles are typically used as part of a Mobile Device Management (MDM) system, for iOS in particular it's the only way to install certificates on the device. While a client certificate could be included in the.mobileconfigprofile, using SCEP allow the OS to renew certificates.
Creating .mobileconfig on RouterOS
Using Apple Configuratator is likely best and easiest. But is tricky to automate since MDM systems would typical handle automating .mobileconfig generation and deployment.
But since our need is only certificates for VPNs, the above .mobileconfig can be generated on RouterOS. Similar to the CA, it is also possible to "share" to allow easy install on Apple iPhone and iPad.
With RouterOS 7.19's support for multiline strings, creating templates is much easier. Before getting code, let's some variable related to creating a .mobileconfig to use the SCEP Server.
:global keyUsage "signature"

:global retries 8

:global retryDelay 15

:global clientname "client$[:tonum [:timestamp]]"

:global exportfilename "/$scepbase-$sysname-$($clientname).mobileconfig"

:put $exportfilename
UUID generator function
Another function is needed before we can get creating a .mobileconfig. The XML has needs a unique UUID for the PayloadUUID fields. RouterOS does not have one built in, thus another function. Note, depending on use case, you may not want to the set a different PayloadUUID since client use it identify the same profile - more complex topic.
# UUIDv4

:global UUIDv4 do={

:local uuid ""

# Part 1: 8 random hex characters (e.g., "xxxxxxxx")

:set uuid ($uuid . [:rndstr from="1234567890ABCDEF" length=8])

:set uuid ($uuid . "-")

# Part 2: 4 random hex characters (e.g., "xxxx")

:set uuid ($uuid . [:rndstr from="1234567890ABCDEF" length=4])

:set uuid ($uuid . "-")

# Part 3: 4xxx (The '4' indicates UUID version 4)

:set uuid ($uuid . "4")

:set uuid ($uuid . [:rndstr from="1234567890ABCDEF" length=4])

:set uuid ($uuid . "-")

# Part 4: yxxx (The 'y' indicates the UUID variant, must be 8, 9, a, or b)

:set uuid ($uuid . [:rndstr from="89AB" length=1])

:set uuid ($uuid . [:rndstr from="1234567890ABCDEF" length=3])

:set uuid ($uuid . "-")

# Part 5: 12 random hex characters (e.g., "xxxxxxxxxxxx")

:set uuid ($uuid . [:rndstr from="1234567890ABCDEF" length=12])

:return $uuid

}

:put [$UUIDv4]
$makeAppleProfileFile - function to generate a Apple .mobileconfig
This is what actually combines all of the various :global's in the notebook. With new multiline strings, and RouterOS LSP, the XML is surprisingly readible
:global makeAppleProfileFile do={

:global getScepAuthorityName

:global caDownloadUrl

:global UUIDv4

:global scepserverhost

:global scepserverport

:global keyUsage

:global certkeysize

:global retries

:global retryDelay

:global clientname

:global scepbase

:global caCertFile

:global sysname

:local caPayloadId [$UUIDv4]

:local scepPayloadId [$UUIDv4]

:local profilePayloadId [$UUIDv4]

:local keyUsageNumber 0

:local keyUsageEnum {"none"=0;"key encipherment"=4;"signature"=1;"all"=5}

:if ($keyUsageEnum->$keyUsage) do={:set keyUsageNumber ($keyUsageEnum->$keyUsage)}

:local xml "<?xml version= \"1.0\" encoding= \"UTF-8\"?>

<!DOCTYPE plist PUBLIC \"-//Apple//DTD PLIST 1.0//EN\" \"http://www.apple.com/DTDs/PropertyList-1.0.dtd\">

<plist version=\"1.0\">

<dict>

<key>PayloadContent</key>

<array>

<dict>

<key>PayloadCertificateFileName</key>

<string>routeros-ca.crt</string>

<key>PayloadContent</key>

<data>

$[:convert to=base64 [/file/get [find name=[:pick $caCertFile 1 1024] contents]]]

</data>

<key>PayloadDescription</key>

<string>Adds a CA root certificate</string>

<key>PayloadDisplayName</key>

<string>$[:convert transform=uc $scepbase] Authority ($sysname)</string>

<key>PayloadIdentifier</key>

<string>com.apple.security.root.$caPayloadId</string>

<key>PayloadType</key>

<string>com.apple.security.root</string>

<key>PayloadUUID</key>

<string>$caPayloadId</string>

<key>PayloadVersion</key>

<integer>1</integer>

</dict>

</array>

<key>PayloadDescription</key>

<string>Adds certificate authority using RouterOS '$sysname' from '$scepbase' organization</string>

<key>PayloadDisplayName</key>

<string>Certificates from $scepbase-$sysname</string>

<key>PayloadIdentifier</key>

<string>routeros.scepclient.$sysname.$profilePayloadId</string>

<key>PayloadOrganization</key>

<string>$scepbase</string>

<key>PayloadRemovalDisallowed</key>

<false />

<key>PayloadType</key>

<string>Configuration</string>

<key>PayloadUUID</key>

<string>$profilePayloadId</string>

<key>PayloadVersion</key>

<integer>1</integer>

</dict>

</plist>"

:return $xml

}
Generate and Share .mobileconfig
Make .mobileconfig file with root certificate
Remove any existing .mobileconfig file, so a new one can be added.
:onerror e in={/file/remove [find name~"$scepbase-$sysname-$($clientname).mobileconfig"] } do={:put "ignoring error: $e"}
Now call the makeAppleProfileFile function to get the XML and add file with it.
/file/add name=$exportfilename contents=[$makeAppleProfileFile]
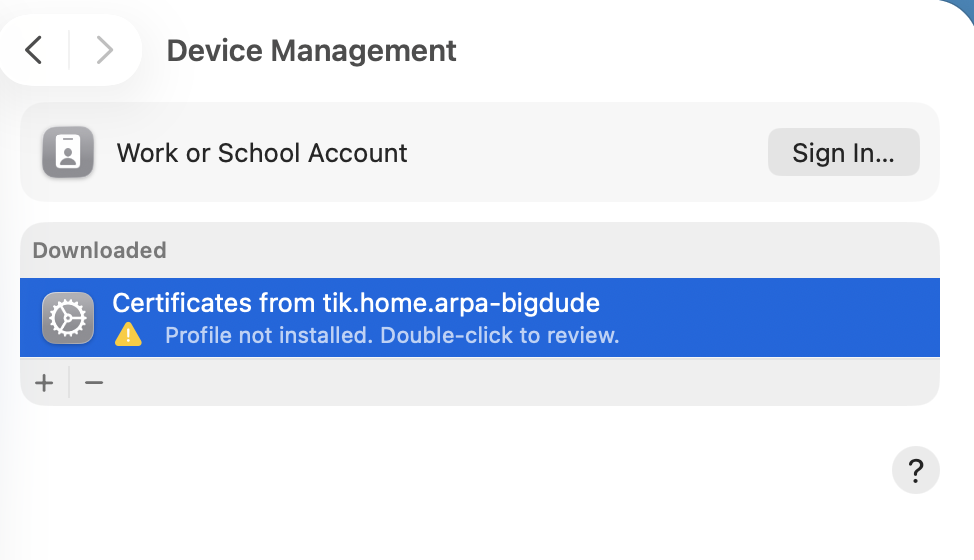
Install Profile on Apple Device
Send the generated .mobileconfig file stored in router's files, to your Apple device. Opening the file on any Apple device will prompt you to go to Settings to install it. There are a few screens advicing what will happen.
/file print proplist=name where name~".mobileconfig"
Setup reverse-proxy to use self-signed certificates
This will only work on RouterOS 7.22+, since the
reverse-proxyis a new feature.
Add DNS to support wildcards
Add use match-subdomain=yes to resolve any domain in DNS. If same MikroTik is not the DNS server, you'll have to setup the SNI for resolve to the router where /app and reverse-proxy is installed.
/ip dns static remove [find comment=reverse-proxy-sni]

/ip dns static add address="$[/app/settings get router-ip]$[/app/settings get assumed-router-ip]" match-subdomain=yes name=$domainname type=A comment="reverse-proxy-sni"

/ip dns static export terse where comment=reverse-proxy-sni
Set reverse-proxy to use self-signed certificates
/ip/service/set reverse-proxy certificate="$scepbase-$sysname-router"

/ip/service/print where name=reverse-proxy
Just in case, restart the reverse-proxy. Although not sure it's needed, just safer for testing
/ip/service disable reverse-proxy

/ip/service enable reverse-proxy
Setup any SNI Rules to use reverse-proxy
You will also have to manually add the designed services to proxy using WinBox4 UI (not CLI) in IP > Reverse Proxy.
See forum post in 7.22 thread for example.
And, RouterOS line ending are treated CRLF, so when copy-and-paste to forum, it adds an extra space. How to deal with line-ending in TikBook schemes is still WIP..
If you open the .mobileconfig on an Apple Mac (or iPhone), you get some prompting an something like this: