MikroTik can probably easily add the setting option to select the VRF to Update Check / License / IP Cloud. They have added the option to choose the VRF to more and more RouterOS services with each update. And the "Check For Updates" menu recently gained a few more options already, so adding one more will not break the UI.
I've thought about your idea of the tunnel and came up with this implementation that appears to be working. The idea is to abuse MACVLAN interfaces for a light weight "tunnel". In this example, the VRF with WAN interface is called secondary.
-
First, add a dummy bridge and two MACVLAN interfaces above it, with mode set to bridge:
/interface bridge
add name=vrf-link protocol-mode=none

/interface macvlan
add interface=vrf-link mode=bridge name=vrf-link-main
add interface=vrf-link mode=bridge name=vrf-link-secondary
-
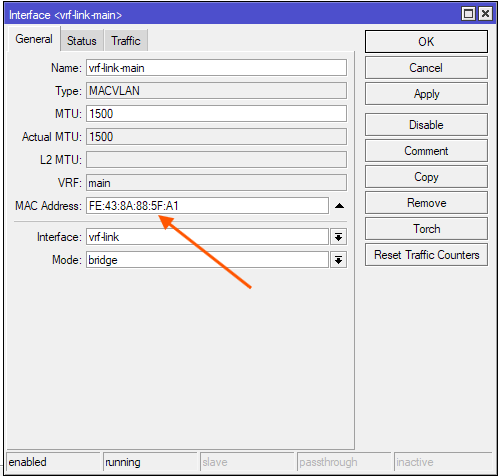
Next, make sure vrf-link-secondary is added to the secondary VRF (do it with WinBox  ).
).
-
Add IP -> Address entries for the two MACVLAN interface:
/ip address
add address=172.18.0.20/24 interface=vrf-link-main network=172.18.0.0
add address=172.18.0.21/24 interface=vrf-link-secondary network=172.18.0.0
-
This is an important step, otherwise it won't work! Add a dummy route for destination 172.18.0.22/32 and a published ARP entry for that address on vrf-link-main:
/ip route
add dst-address=172.18.0.22/32 gateway=lo routing-table=main

/ip arp
add address=172.18.0.22 interface=vrf-link-main published=yes
This will make sure that the router announces itself as recipient for destination 172.18.0.22 on vrf-link-main!
EDIT: See updated step 4 in the post below: How to keep CHR renewal when main VRF does not have internet access (but a different VRF has)? - #20 by CGGXANNX
-
Add two SRCNAT rules at the top of the NAT table, one for traffic coming out of vrf-link-main, and one for traffic coming out of the WAN interface with the source address 172.18.0.22:
/ip firewall nat
add action=src-nat chain=srcnat out-interface=vrf-link-main \
    to-addresses=172.18.0.22 place-before=0
add action=masquerade chain=srcnat src-address=172.18.0.22 place-before=1
-
Now we can add the route in @main that uses 172.18.0.21 as gateway. I am adding a default route here, but you can adjust the route(s) to match only MikroTik's address ranges.
/ip route
add dst-address=0.0.0.0/0 gateway=172.18.0.21 routing-table=main
With this setup, the router has internet access, at least for the Check For Upgrades functionality, although the only way to the internet is on the secondary VRF. It needs no mangle rules or routing rules at all.
In @main traffics to the internet will be redirected to the gateway at 172.18.0.21, which, to the router, looks like a host plugged to the vrf-link-main ethernet interface. So it will use ARP to find out the MAC address of that host on this interface. The router itself on vrf-link-secondary will answer this ARP request, with the MAC address of vrf-link-secondary.
Packets before being sent to 172.18.0.21, will be handled by SRCNAT, with the original source IP address replaced with 172.18.0.22. Packets will then go out of vrf-link-main.
The "remote" host is actually the router itself, on the interface vrf-link-secondary, which is in the secondary VRF. It sees the packets arriving from a host plugged to vrf-link-secondary, and doesn't know that the sender is actually itself.
The packets have the source 172.18.0.22 which is not an IP address assigned to the router! Packets will be forwarded to WAN (in secondary VRF). Before going out, the 2nd SRCNAT rule will masquerade the source address (no longer 172.18.0.22, but the address on the WAN interface).
Response packets arriving from WAN to the router will have that NAT-ing reverse, and the destination of the response packets will be changed to 172.18.0.22. We are still in VRF secondary.
The route to 172.18.0.22 in this VRF has the gateway set to vrf-link-secondary (which is one of the MACVLAN interfaces). Router will sends ARP on this interface to find out the remote MAC address belonging to 172.18.0.22.
Due to the published ARP entry and the /32 route from step #4 above, the router will announce its MAC address on vrf-link-main as the one for 172.18.0.22.
Packets with destination 172.18.0.22 are sent out of vrf-link-secondary and arrive at vrf-link-main. Once here, SRCNAT (the first rule) will be reversed, changing the destination address 172.18.0.22 back to the original sender IP address in @main.
We cannot get rid of the 172.18.0.22 intermediate address. If we use 172.18.0.20 in the NAT rules (the address on vrf-link-main), the reverse SRCNAT-ing will not work (probably because the router sees 172.18.0.20 as one of its own addresses in @main). Maybe this is the reason why your tests with tunnels didn't work. Because your tunnels have the two ends both being the router's IP addresses.